Building The Vortex - v1
Sometimes (but certainly not always), a bit of stubbornness and determination works in your favour. This was the story of my first art installation, The Vortex. My friend – also called Nick – and I were liming one evening and nerding out about art installations, lights, interactivity, and all that cool (for us) stuff. Then he looked at me and said “dude, I wanna build this LED tunnel with 3D lighting sequences for the next Sunsetters weekend festival”. And I replied, “say no more, let’s do it”.

Our 3D model of The Vortex
This was some time in May 2023, and the festival was scheduled for early August 2023. I was also totally unavailable for July 2023, ultimately giving us the 4 days leading up to the festival to start and finish the project. That was Monday 1st August to Thursday 3rd August, and the festival was opening on Friday 4th August.
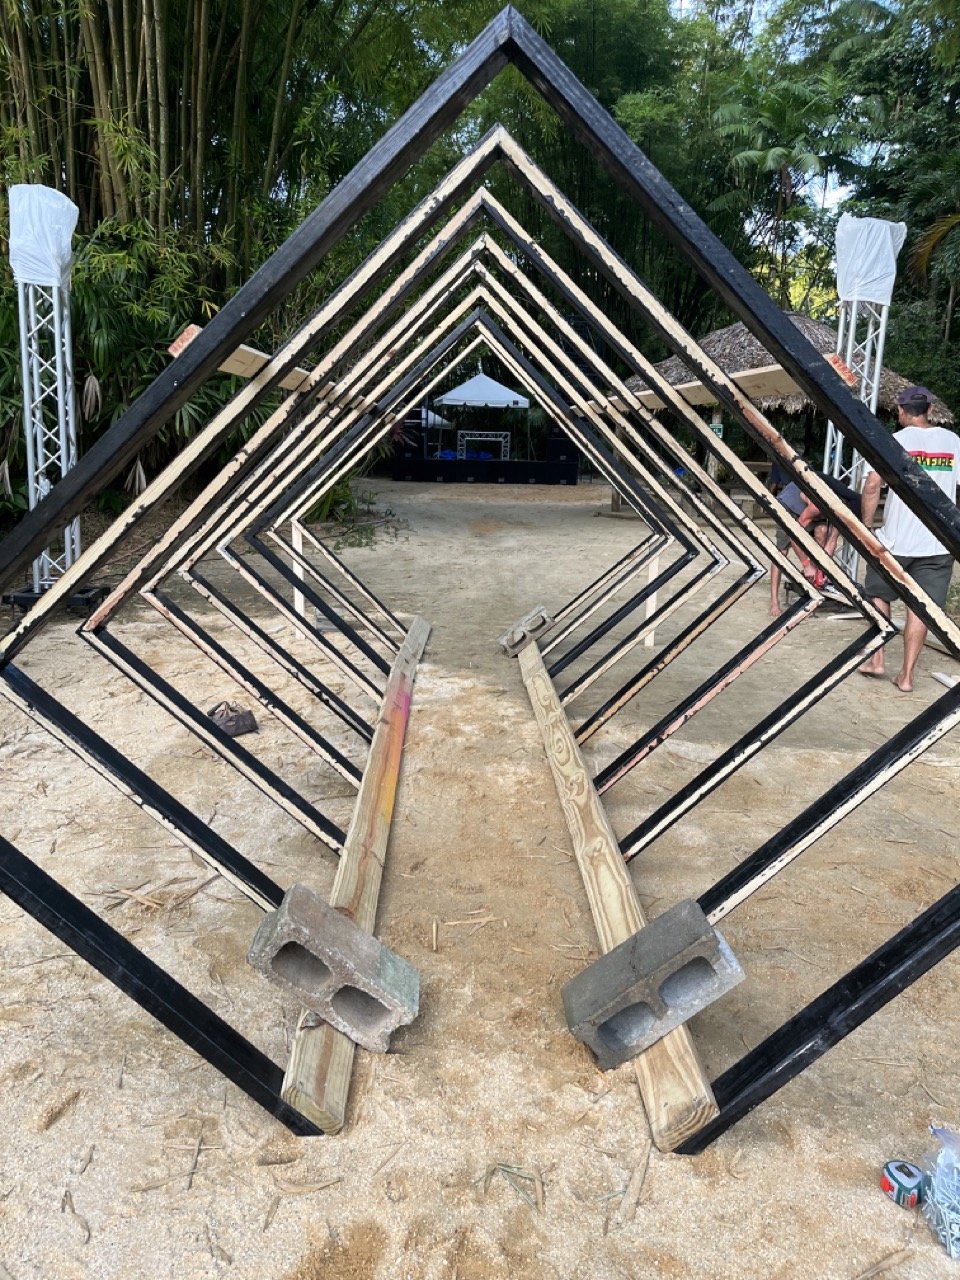
We designed the tunnel to be 12 frames long, with an apex of ~7’, and with 2’ of space between each frame. The intention was to run a full 5m (or 16.4’) strip along each frame, with a pixel density of 60 pixels per meter totalling of 3600 LEDs. While I was away, I drafted a design document and included a list of things to purchase for the build. Nick purchased everything, and got started on construction. The moment I returned, we got cracking on the electronics and lighting, working 5 days straight until all kinds of hours. Did I mention he still had an entire festival to plan and run?
Some “Technical” Stuff
In the tech world, knowledge sharing is one of the most important things. Forums, open source projects, you name it. I’d worked as a software engineer for many years, and the whole concept of knowledge and open sharing of it was instrumental for me. So when I’d read online many times about the capabilities of a certain cheap microcontroller, I felt confident enough to commit. Up until that point though, my experience with electronics, controllers, lighting software, etc., had been largely experimental and small scale. Still, I committed, and went headstrong into the wind. I settled on this hardware:
A Teensy 4.1 microcontroller
A bunch of 5v WS2812B LED strips
A couple 5v DC switching power supplies
The remaining hardware consisted of some wires that I had hanging around, and some 3-core 18 gauge wire that we ordered as well. Very basic.
In terms of software, I’d been tinkering with Mad Mapper a bit. I read in their documentation that you could route Art-Net data directly over USB to an Arduino-based controller, with just a few simple configurations and by uploading some open source code to the controller. My understanding of various protocols like DMX, sACN, and Art-Net was near non-existent at that point. Perfect, I naively thought… let’s power 3600 LEDs with this setup!
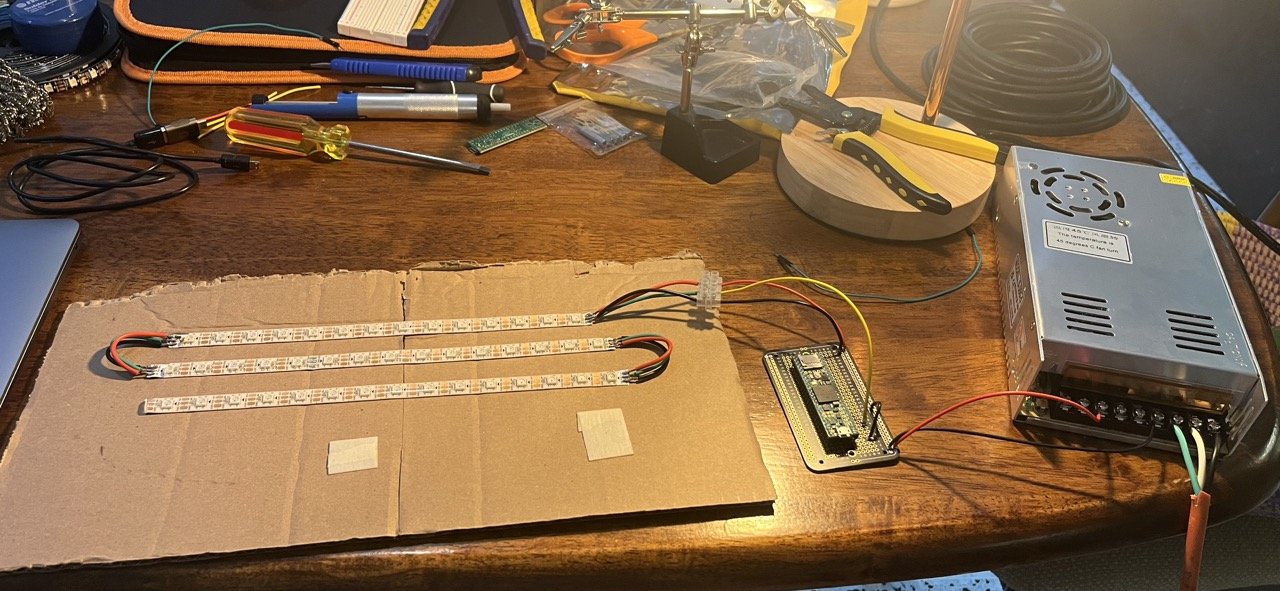
My Absurdly Simple LED Driver
On the Monday morning of build week, I built a simple breadboard setup working on my desk, powering about 45 LEDs. The USB cable was powering the Teensy, and the Teensy 5V output was in turn powering the LEDs. The 45 LEDs were divided into three strips of 15, and they were all receiving data from a single data wire in a zigzag manner. On my laptop, Mad Mapper was running, and I sent the Art-Net data over USB by selecting that option in the preferences. I learned my first bits and pieces about DMX universes and channels, and ran my first pattern to my test setup. It worked how I wanted… huge victory!

A Teensy 4.1 receiving data from Mad Mapper over USB, and forwarding it to the LED strips
At this point, I figured this would be good enough to scale up. I knew about power injection, and did some basic research:
Each WS2812B strip draws a maximum of 18A at peak white
But I’d never run peak white brightness anyways, so I figured < 10A per strip
Two 5V 60A power supplies should more than do the job
😬
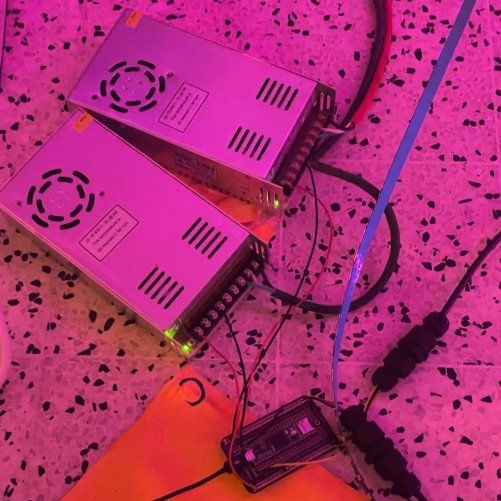
Now, all I had to do was make a more permanent circuit board, solder up some beefier waterproof pigtails to the LED strips, and measure out a bunch of wire. I must say, my soldering skills at that point were very rudimentary, but I had to level up quickly. Nick and I got to work on this in his living room, and just seeing cute blinky lights gave us great hope. Nick had already built the 12 frames, so we were heads down now into soldering up and testing our giant LED array.
The “permanent” circuit board, which was essentially the breadboard replicated on a solderable protoboard. This time, the LEDs were receiving power from a power supply.
By the end of Monday, we had the Teensy controller hooked up to the circuit board, 2 strips soldered up and hooked up to power and data, and Mad Mapper sending the light show data over USB through the controller to the LEDs. My circuit was working, and we were on a roll.
Here Comes The Trouble
On Tuesday, refreshed and inspired, we got back to it. We had a system going, and we wired up strips 3 to 6 by around 10pm that night. It was late, but we were determined to continue, so we moved onto strip 7.
A Glitch In The Matrix
This is where things started to go wrong. Strip 7 was totally glitchy! We already noticed slight glitches here and there, but were ok with it. The occasional pixel freaking out, some data loss at higher speed animations, etc. But strip number 7 was an absolute disaster. The colours were erratically cycling through red, green, and blue, and there was no resemblance to the animations whatsoever. Our hearts sank, but what did we expect? I was almost waiting for this moment during this to good to be true first effort, but was equally really saddened by it.
6 frames out of 12… not great, but not bad either. Half the length, 8 would be much better. We decided on no real insight to continue to see what happens. Oddly enough, as we attached strip 8, strip 7 started working (mostly), and the bugs transferred to strip 8! We did the same for strip 9, and the same happened again. This time though, there was an overall increase in weird behaviour in all 8 previous strips. But we agreed that it was fine and would be largely unnoticeable to most people. 8 frames it is, with strip 9 attached and buried in a bag somewhere off to the side.
Almost Giving Up
On Wednesday, we moved the entire wire assembly and the frames from Nicks’ apartment to the festival site. We hadn’t even come close to doing a fully assembled dry run at this point, but we also didn’t have time. Needless to say, our poor soldering and heat shrinking job suffered big time during the transportation run, and our wire array which was working 24 hours prior was now completely non-functional.
This discovery happened at 6pm, 2 days before the festival open date. We almost completely gave up on the project at that moment, but decided to give it another major push. I think I got home at close to 4am after that work session. There’s a fine line between perseverance and stubbornness, and knowing when to call it quits. Both can be either the right or wrong choice. In this case, both of us were stubbornly committed to getting this thing up, and with our LED array re-soldered and shrink wrapped much more carefully, we felt a combination of relief and exhaustion.
On Thursday, I stayed at home and finally got to work on the animations. These also wouldn’t be tested at all on the project until the first assembly, which was scheduled for the next day, which was also the opening day of the festival.
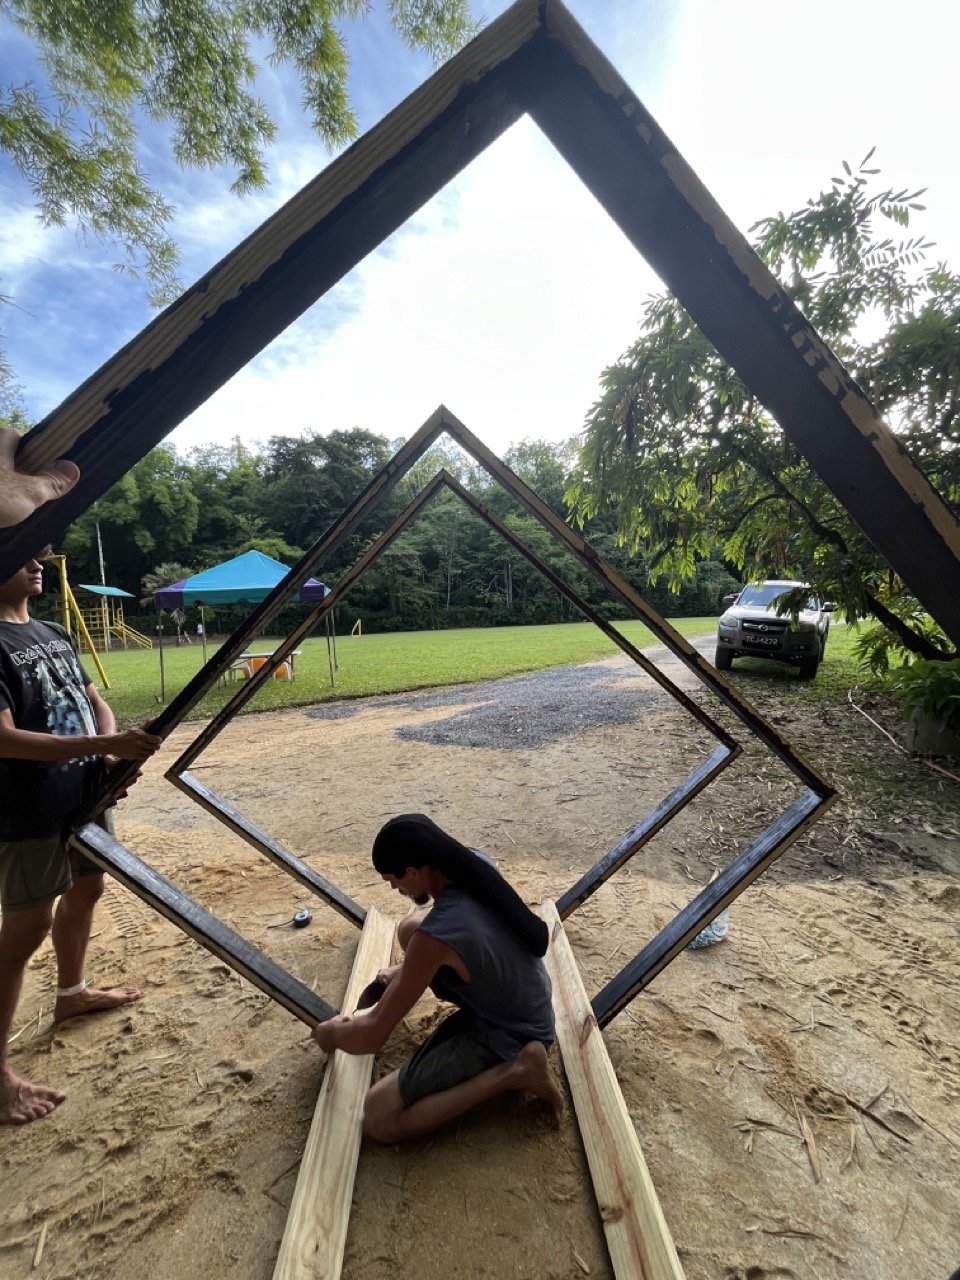
Setup Day
Nick and I decided that we’d only run the installation on the Saturday of the festival, which was the “main” night. We'd position it as the entrance to the main stage area, and nothing was happening on the main stage on the Friday. This gave us all of Friday to set up the frames for the first time. Setup was fun, and we got a lot of help from friends. Finally, the project was coming to life.
Later that afternoon, we re-tested the entire LED array. Even though it had been largely stationary overnight, we were fully loaded with anxiety and wanted to make sure nothing mysteriously broke (again) overnight. To our relief, it worked still! We decided to leave the lighting and wiring off the installation til Saturday. Risky in some ways, because it meant that if anything went wrong on Saturday, we’d probably not have enough time to fix it. But it also meant one less day of it being exposed to the elements. Mind you, the goal here was to make it rugged and waterproof, but that got entirely deferred to version 2.
Attaching The Light Array
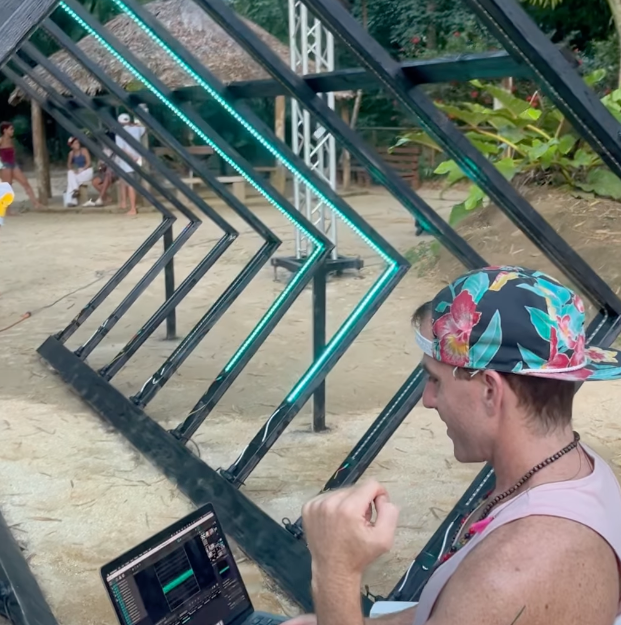
We danced and relaxed and had a fun Friday night, and on Saturday around midday, we very cautiously moved the lighting array from the storage room to the installation site. Again, friends came along to help, which was really amazing. Frame by frame, we eyeballed midpoints and centrelines, and fastened the lights to the structure. Then we tidied up some wires and did some last minute decision making, and stuffed the control unit into a tupperware.
It always fascinates me that when you’re down to the wire with a project, you really start seeing things through the lens of the person that’s interacting with it. As time moved at a seemingly speedy rate, it simply meant:
Minimize hazards. This meant burying a wire that ran across the first frame, taping any dangly wires with electrical tape, and scrappily attaching a few upright posts to prevent any roll on the overall structure.
Protect the electronics. Our “electrical box” was a work of art, I must say. We bought a big tupperware in the food section of the hardware store, and drilled some holes drilled at the bottom of it. After resting it on top of two small planks of wood, we stuffed the two power banks, our very advanced control unit, a USB fan, and my laptop into it. My laptop had to sit on its side, and stay slightly open to ensure the lighting software kept running. Like I said, a work of art.
Turn the dam thing on. Please just work. Buggy behaviour is OK, a little flicker here and there is fine, but please, just work.
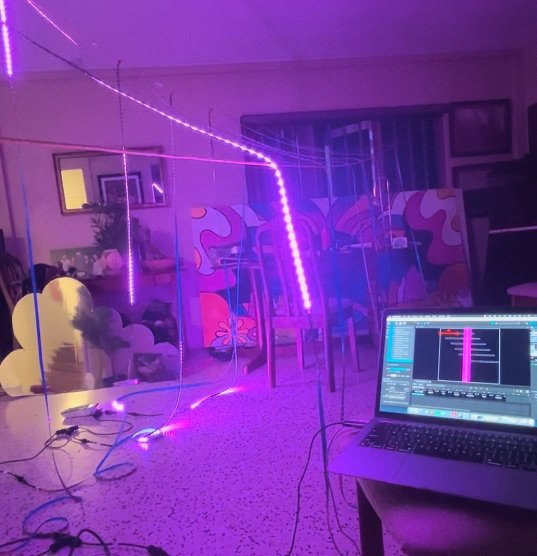
Powering On… It Works!
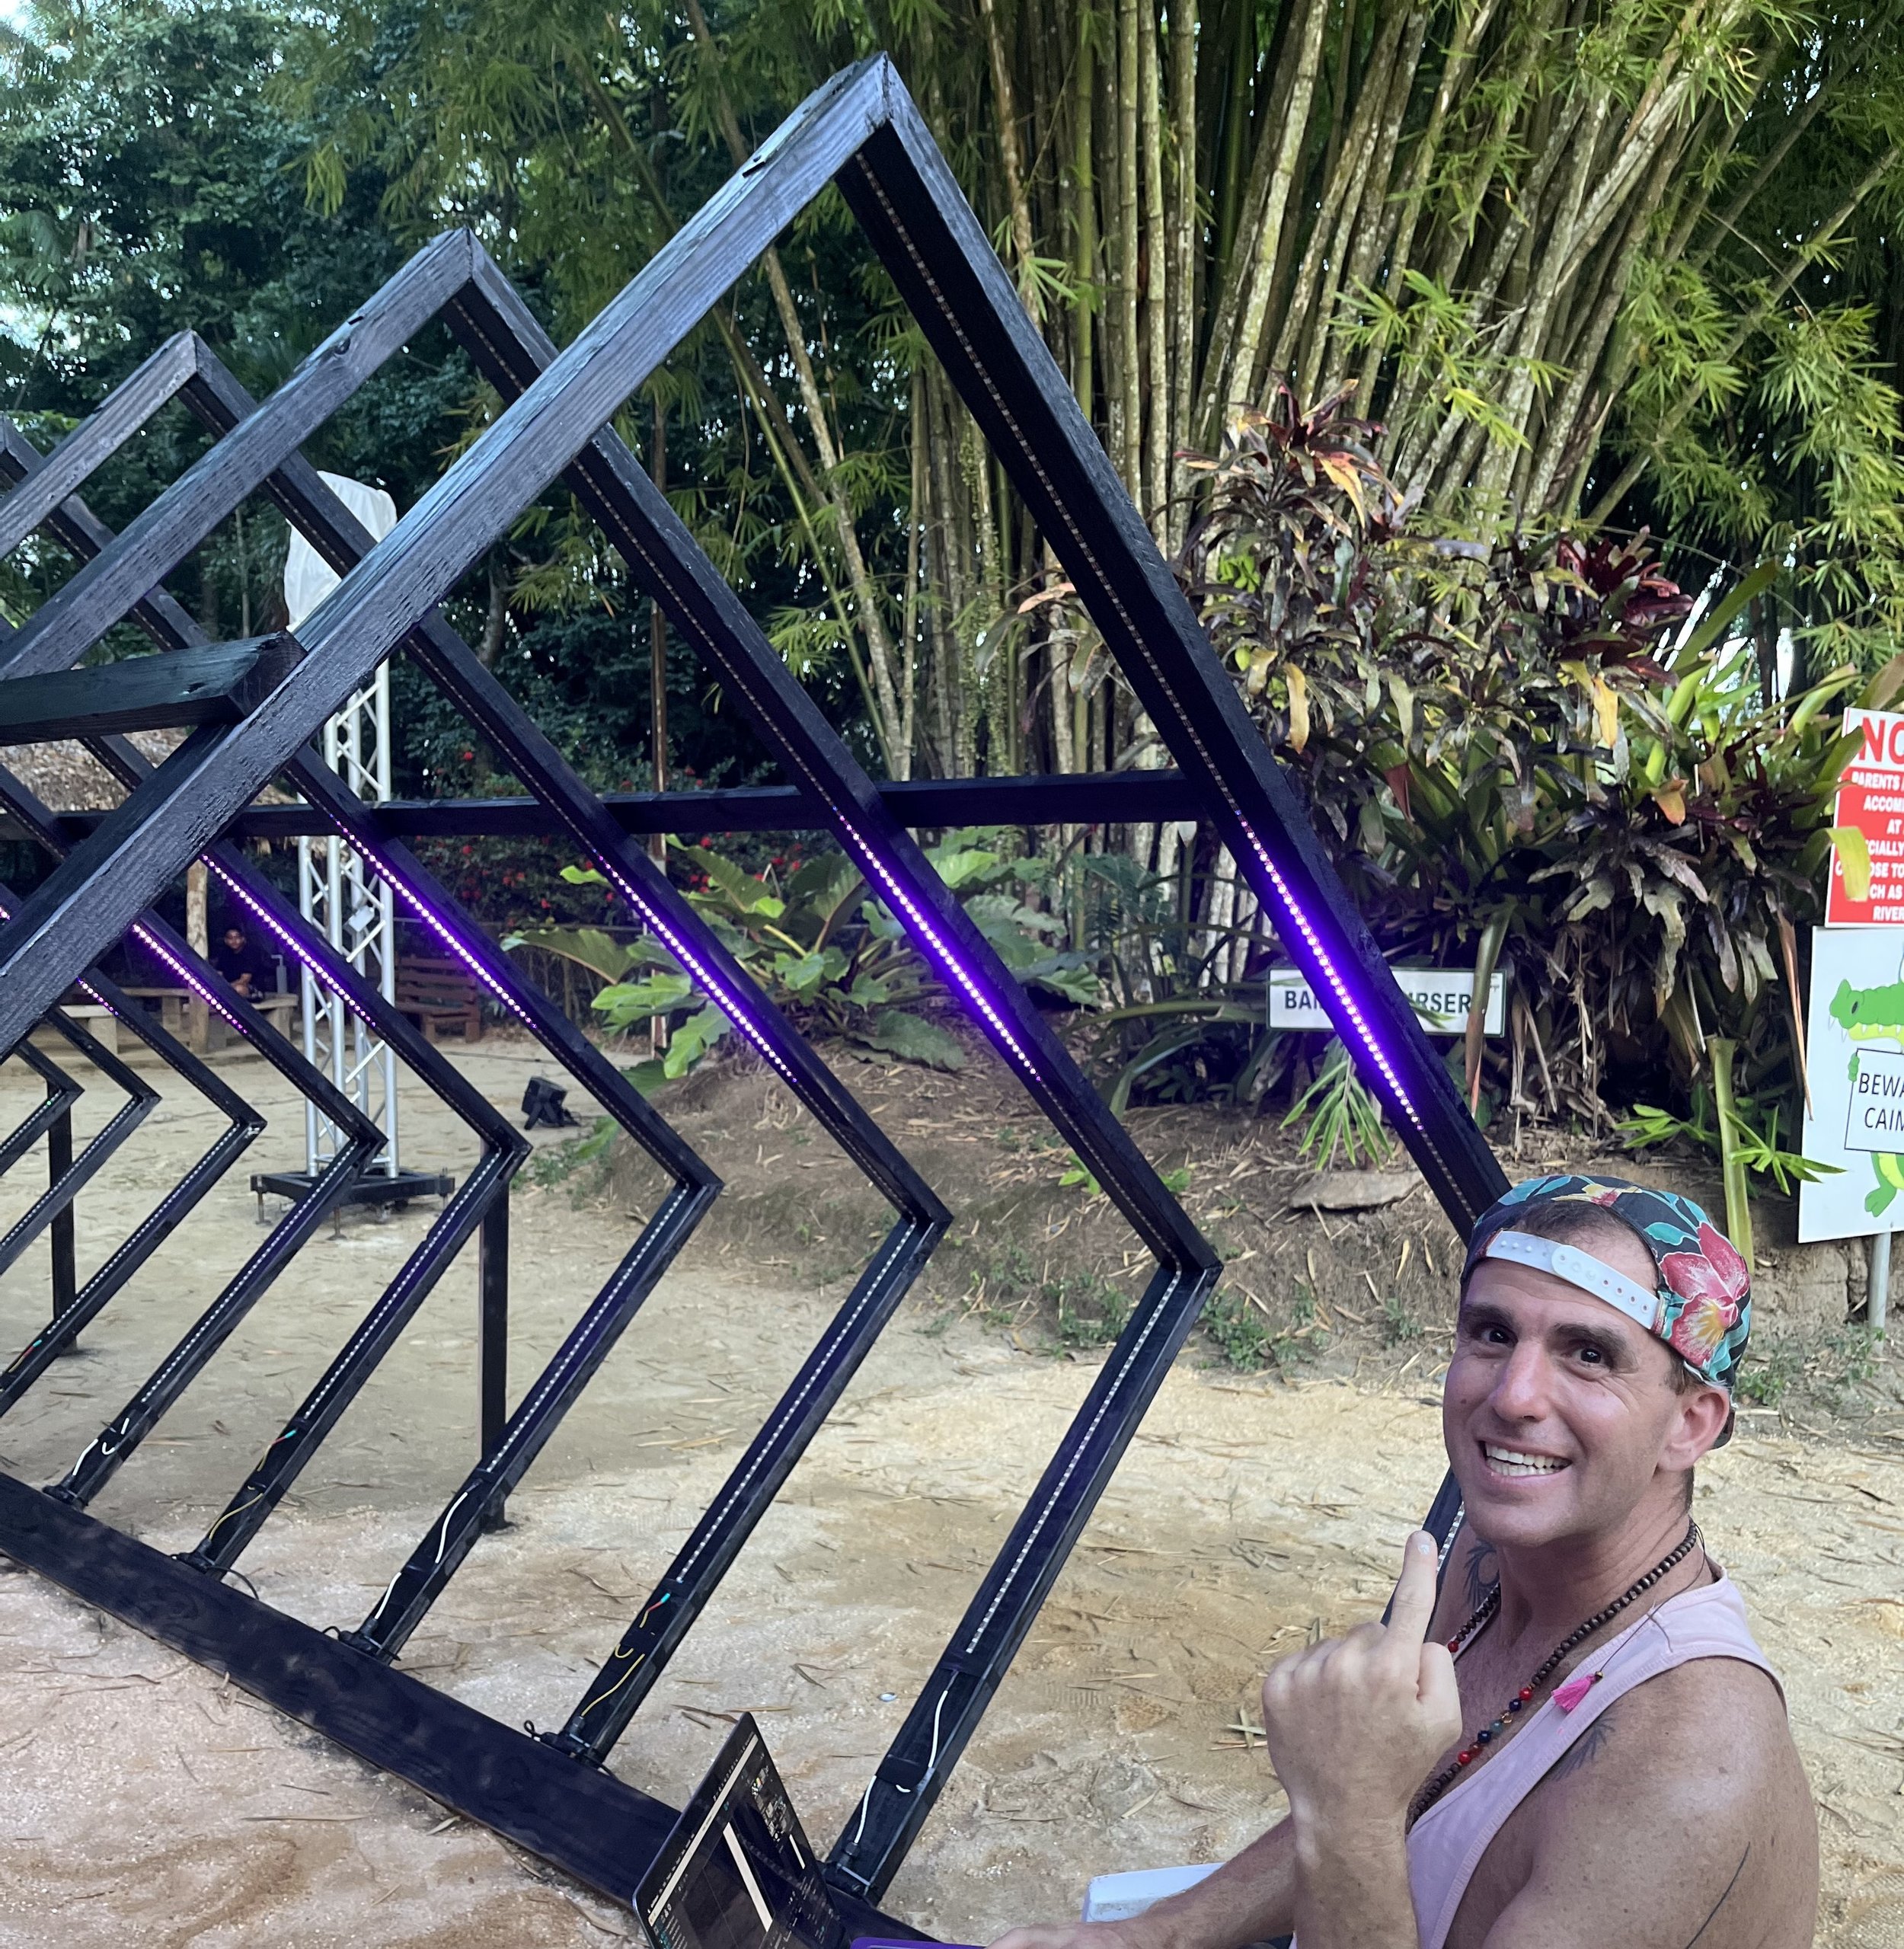
A picture is worth a thousand words. So they say, whoever they may be. I hate having pictures taken of me, but sure enough, my expression here is a genuine combination of overwhelming joy, excitement, and relief. Me and Nick totally jumped up and high-fived like mega bros immediately after this. I’ll forgive it! But on a real note, seeing this thing up and running for the very first time felt like such an immense achievement. Until that point, I’d only designed the majority of the lighting sequences on my computer, and hadn’t tested them out on actual lights yet. We ran through all the sequences, celebrated joyously, and left it running.
The gamble wasn’t over just yet, of course. We’d barely ran the show consecutively for more than a few minutes at a time. This thing needed to stay lit up for about 8 hours. My initial excitement wavered quickly into anxiety, but with each passing minute, it softened and smoothed into a calm state of elation. This thing was running, and it was going to survive the night.

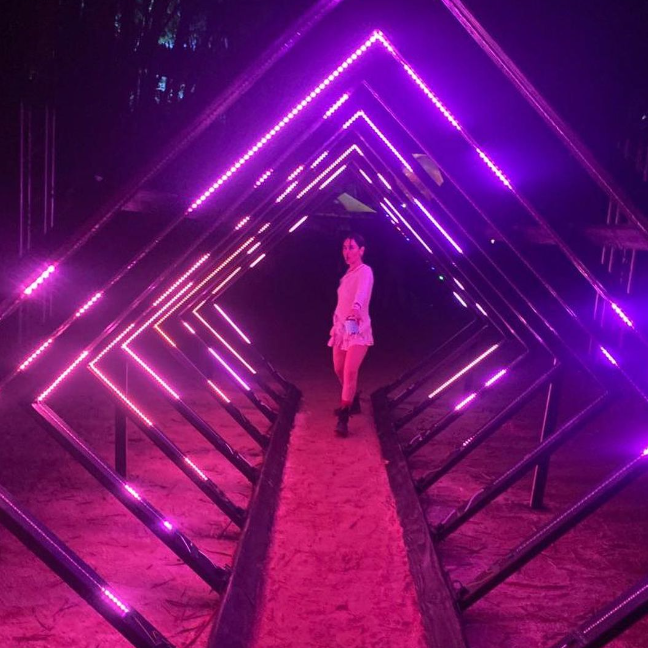
Throughout the week leading up to this moment, Nick and I both shared a lot of similar feelings. But one theme that kept coming up was the question if people even care. We built a blinky light tunnel, so what? Are people going to notice it, engage with it, and even care about it? Why bother? I suppose that question can be asked about so many things, especially creative work. Why even art? So as the night rolled on and people filled in, we witnessed a beautiful thing. All the beautiful festival goers awed at the tunnel, danced through it, ran back and forth, waited for their favourite sequences, and took video and pix with their friends. I think I spent most of my night observing it from a distance, looking at people as they continuously engaged all night, and simultaneously waiting for it to completely stop working – which it did not!

Every time I ran into Nick over the course of the night, we shared a moment of joy and pride together. Obviously there was a lot in it for us. We both love learning and building, and having the outlet to do something like that is perfect for us. Did people notice and care? Yes, absolutely. If it wasn’t there, perhaps nobody would’ve asked “where is the art”? But it was there, because we wanted to build it and put it there. And people seemed excited by that. So why art? For the people, and also for yourself.

Lessons Were Learned
Where do I even begin? Let’s go in order.
We built a very heavy art piece. When I was away and we were deciding on material specs, I pushed Nick into using 2x4”instead of 1x3” slats for the frames. He gave in, but we both laugh about it now. If I was around and I saw the lumber in person, there’s probably no way I would’ve pushed for the 2x4s. Still though, we accept it now, and convince ourselves that we’re better off for it.
Full assembly and rigorous testing is necessary. Let’s be real, we got lucky. We designed a thing on paper with very limited knowledge, and didn’t once test it fully until hours before its first unveiling. For the next iteration, we definitely need a place to fully assemble it and run tests on it for hours on end.
Make everything 2-3 times as rugged as you think. Solder joints should absolutely not crack in transit, and things should work for years. This only happens if you make everything very rugged. Protect everything aggressively!
Circuit design, power distribution, and signal integrity. Resistors, capacitors, fuses, and level shifters were all completely absent from the initial circuit. Fusing power lines is an obvious one, and we actually blew out two strips during testing because of unfused lines. I’ll save the rest for a more technical blog post, but lack of understanding on concepts like voltage drop and signal integrity really showed themselves on the first iteration. Next time!
LED strip ratings. Up until recently, I just assumed that the run of the mill 5V WS2812B was the go to thing for art installations. I had no idea about concepts like voltage drop, and didn’t even think about the good old P = IV equation and how that would impact power supplies and distribution. I just knew that THE 12V WS2815 strips were much more expensive, and we wanted to save money. We learn by doing.
Read the data sheets. This was a scary topic to me a few months ago and during the initial build of this project. But since then, reading through parts of the data sheets for the various components we used, I realised quite a few shortcomings as mentioned above.
Share the knowledge, ask for help. Since packing up The Vortex, I’ve been doing a lot of reading, research, and prototyping. I’ve also been talking to friends who are knowledgable in the field. This has really helped me strongly grasp some important concepts, and give me confidence to build better in the future.
Learn by doing. Probably the most important lesson of all is to learn by doing. In such a condensed period, we both learned so much and are brainstorming tons of other ideas. Mistakes were made, but so much was learned as a result.
Where To From Here?
Nick and I are keen to do a V2 of The Vortex. Some goals we’ve set:
Light up the full 12 frames
Make the whole structure modular for quick setup and teardown
Tackle things like signal strength and integrity
Manage power distribution in a much better way
Use Art-Net protocol properly for faster frame rates
Add a lot more animations
A Massive Thank You
This was a big collaborative effort between people, places, and events. So a big thanks:
To Nick, who was as stubborn and determined and excited as I was to get this project off the ground, and to look forward to future iterations and more projects. An enabler in all the constructive ways.
To Sunsetters, for running an incredible weekend festival, and providing the perfect environment to produce and showcase art. On top of all that, for financing the majority of the project and supporting the mission.
To La Vega Estate, for a beautiful space surrounded by lush greenery, and giving us the flexibility and leniency to store stuff and operate on our own time.
To the volunteers, who jumped in on the Friday and Saturday to help set up and pull this off. That was massive.
To all the beautiful people, who came and enjoyed themselves, danced all night, ran laps through The Vortex, and filled me with joy.
See ya next time!